Mock screenshot / Animation test
- Karl Smith
- Sep 17, 2018
- 2 min read
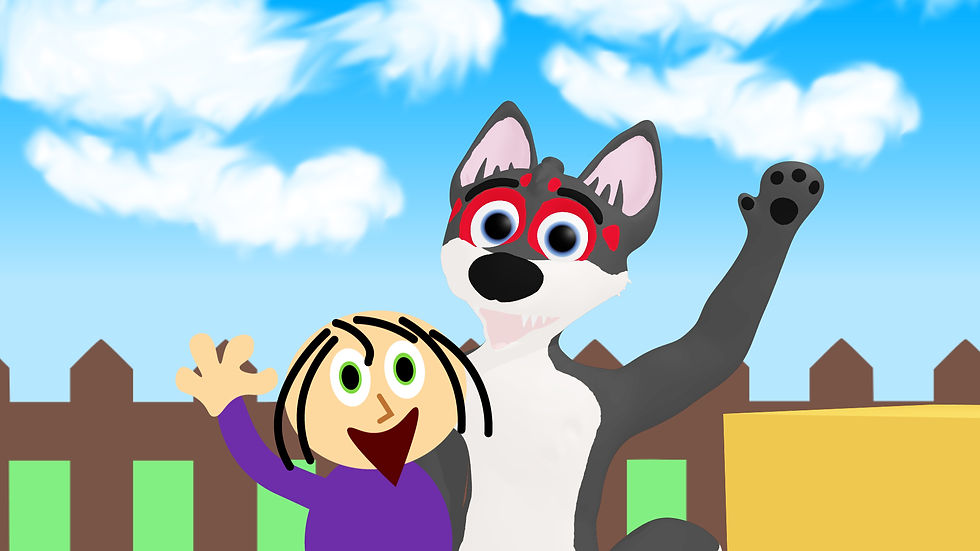
It was advisable to us that we should create a mock screenshot to see if the style and colouring would be possible to create, as well as looking consistent when we composite all animation footage into Adobe After Effects. For my one, I built up a mock based on the photoshoot scene (Storyboard 9.3) to understand how the 3D Troy would integrate with a 2D human.


Using Maya's standard renderer, I rendered a pose of Troy waving to the camera which resulted in a flat 2D-like approach, which is something that I'd be aiming for from the beginning. I also added a standard cube to understand how 3D props would be integrated. A 2D vector of a fence was also used in the scene as a placeholder.
I then roughly drew up the young girl from the storyboard shot as a vector graphic in Adobe Illustrator. By using vector graphics, it would allow me to export an image created with it into any desired resolution I'd want, unlike in Photoshop where the drawing is restricted to the set resolution or lower. Additionally, I could export each part of the character such as head, arms, and legs as it's own PNG file, and then rig it up into After Effects. I'll also be moving the facial features around the head to give the illusion that she is rotating, but that will come when I get to the animating process.
With all these elements put into composition, I am quite happy with the result it came out with, as the line-less flat colours make both the 2D and 3D elements blend seamlessly together, along with successfully making the shot look nearly identical to the storyboard. However, the lack of shading does pose a problem as there is no depth perception to be found on the characters and props. To remedy this, I'll be adding cel-shading onto the 3D elements, although I'll have to look into how to apply shading on the 2D aspects. Additionally, there is no set colour palette to give the shot a concrete tone. For this, I'll be using a big empathises on light colours, particularly yellowish, to complement with the hopeful and positive tone of the documentary.
To finish off this blog entry, I applied the custom-built cell-shading (which I'll explain about in the next blog entry) and performed a quick animation test to demonstrate the character capabilities (embedded below). This waving animation showcases the smooth movements, the eye blinking, and the eye movements. The result is pretty satisfactory, although I still need to fix up the weight painting aspect, which I'll get to eventually.


Comments